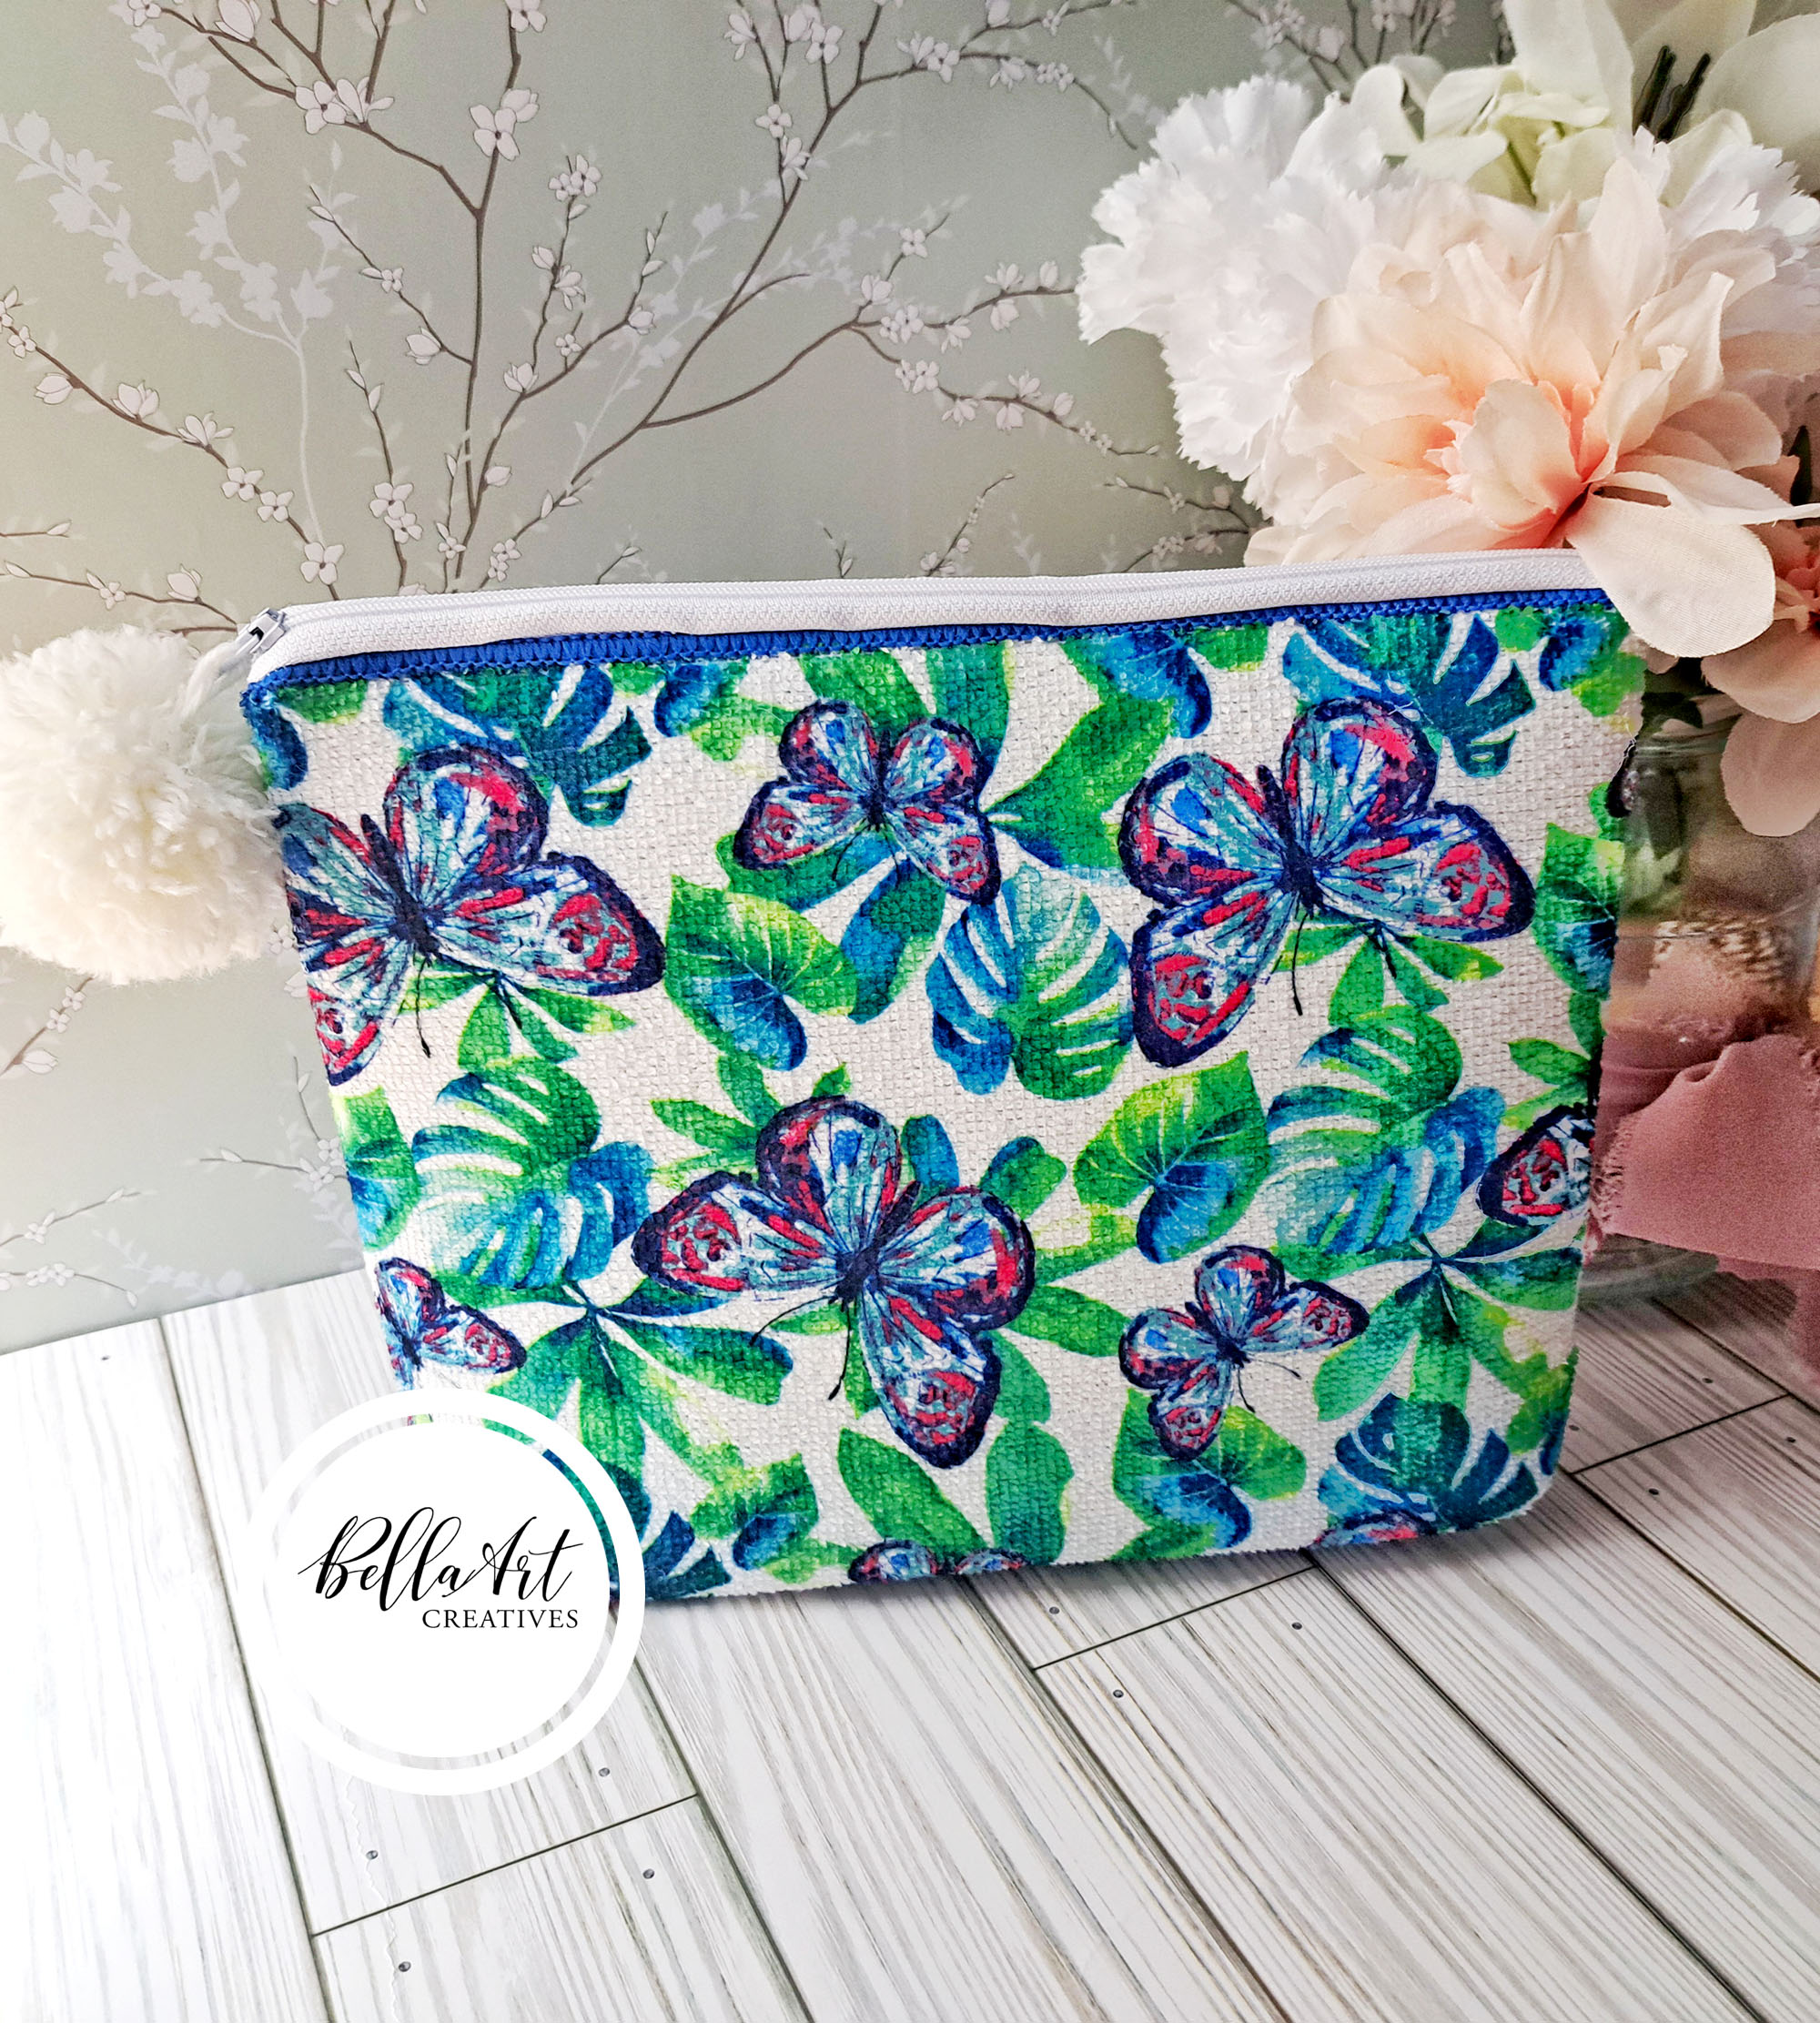
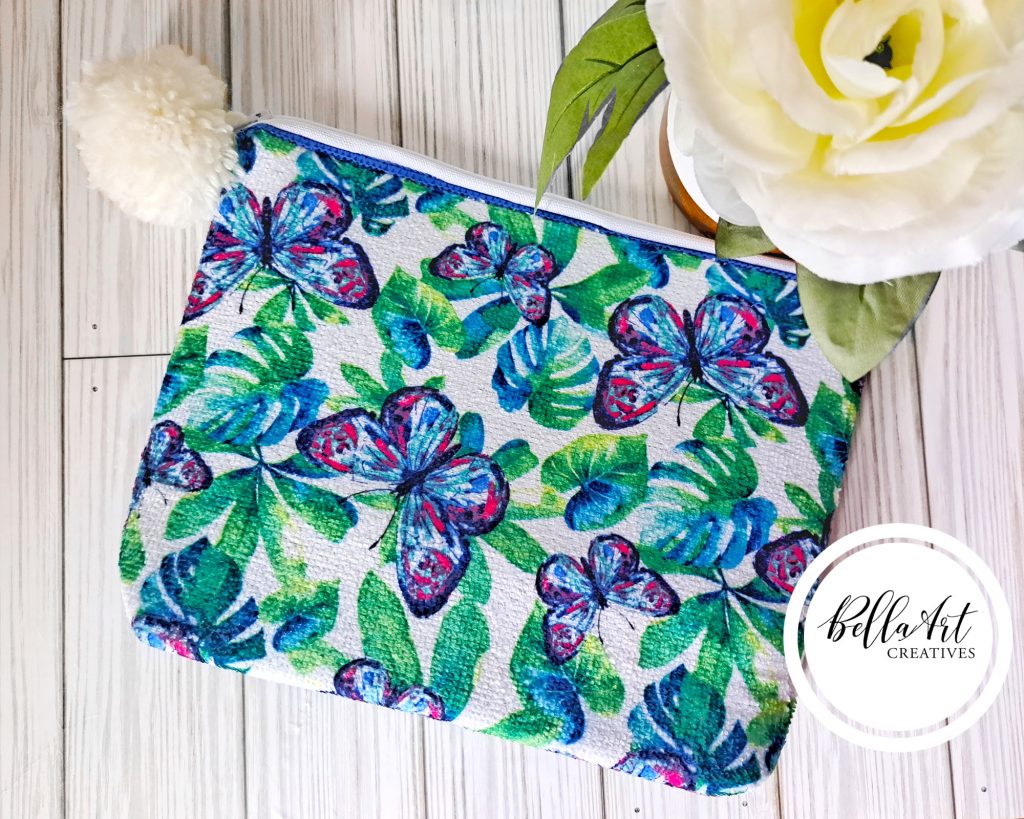
Hey my friends! Today, I’m sharing a new item I finished late last night, I mean late like 1 AM! 😀 I made my first zipper item on my Sew Mighty sewing machine!
I’ve been wanting to try sewing a zipper and I was intimidated but, I saw this video tutorial below on making a zipper pouch using the Dish Drying mats from DT! So, when I was shopping there, I picked 2 of them up. I ruined the 1st mat, we won’t talk about it! LOL! We’ll focus on the success of this project!
Video Tutorial
I recently subscribed to She Sews Seams on YT, because I like how fun she is as she teaches sewing. I re-watched this video so many times and finally I said, “let’s do it!” I was concerned that the mat might be too thick to go through my machine and I won’t kid you, my machine struggled at times to sew through the fabric.
But, I took my time and helped my machine by gently pushing the fabric through and sometimes, lifting my presser foot to re-align it and continued sewing. So, here’s the video, it is a short one and the pouch doesn’t take long to make especially if you are a whiz at sewing. For me, it took me about an hour.
You can also watch the video on YT here.
Enjoying Crafting at any time of the Day
This doesn’t have anything to do with today’s post, but I just have to say that I was having so much fun sewing at 1 AM in the morning! Since retiring last week, I’ve been trying to figure out my new schedule. Because it’s just me and hubby and we live in our home not in an apartment anymore, I can craft anytime I like. I can’t tell you how happy that makes me feel. My life had been on hold for so long and it’s a blessing that God has changed all that. Now, back to the post!
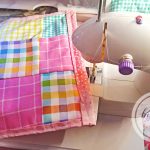
Sewing the Zipper
I recently purchased a bundle of 12″ assorted zippers on Amazon and before I started this project, I looked at other videos on how to sew in a zipper. Also, I bought a set of zipper presser feet to see if they would fit my Sew Mighty. It seems they do, but I need to play with them a little more. I just used my regular presser foot for this pouch.
I decided to use a white zipper to match my thread and that worked, again as mentioned my sewing machine struggled getting through the thick fabric so I went very slowly and using my hands helped guide the fabric through the machine. Once I got the right part of the zipper on, I was feeling pretty proud so I started on the left part of the zipper.
When I got the zipper on, that’s when I did the “boxing” part of the pattern on the bottom left and right sides. This is where the machine really struggled to sew across even just for a small part of the bag but I did get that done and that made me happy and the pouch can stand up.
Putting it All Together
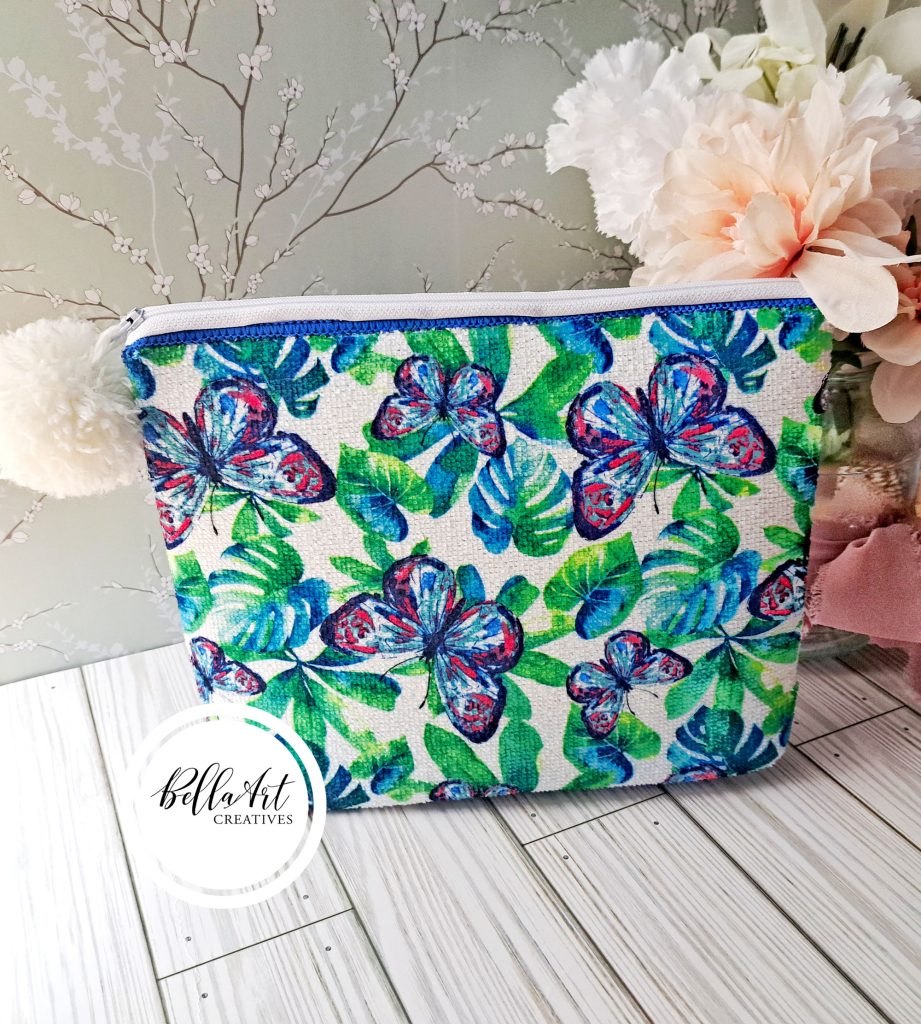
After that, it was pulling the back inside out, corners and all to reveal the pouch! Ahhhh Success!
I did a happy dance!

Here’s a couple of pics of the pouch unzipped! I did it!!!
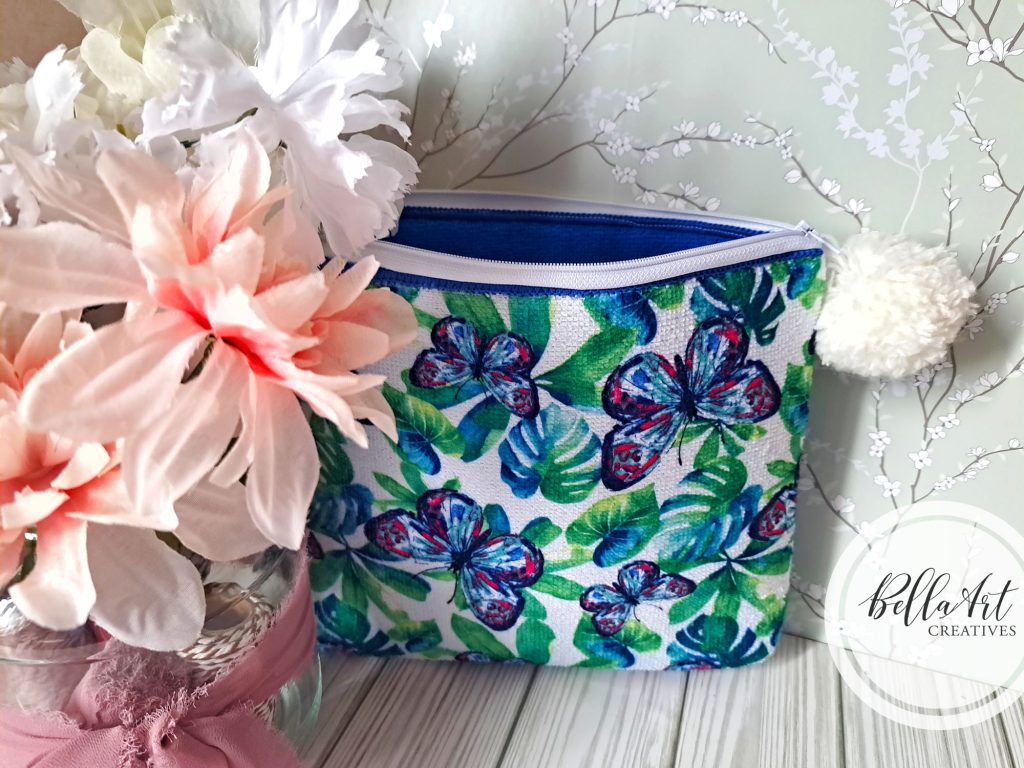
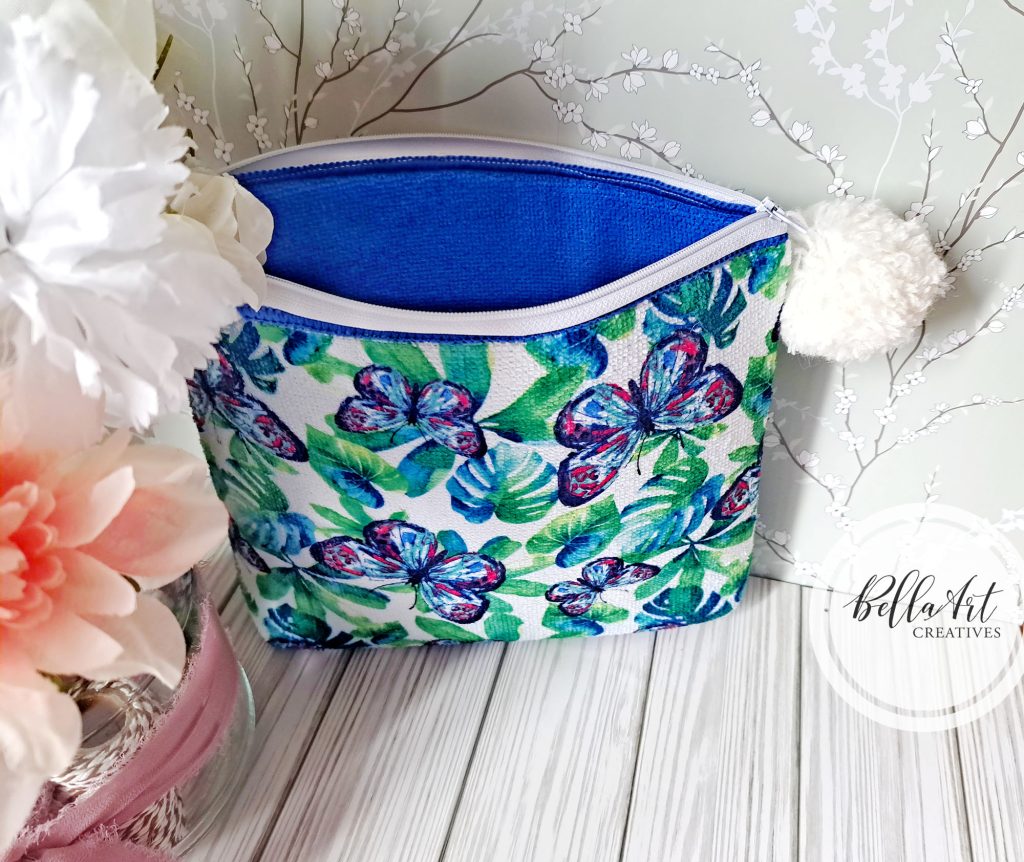
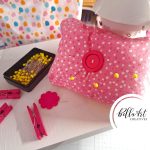
Today, I added a pom pom with white yarn from Crafter’s Square and my pom pom maker (small size). I also used a small wire brush to separate the yarn strands and make the pom pom more puffy. I think it adds a special cuteness to the bag! And she’s all finished! Have to decide what to put into her. With the padding, it can hold a lot easily! Another win for my portable sewing machine!
Thanks for Reading, links to the supplies I used below!

Some of the links to the products I used are affiliate links which means that when you shop with them, I’ll receive a small commission at no extra cost to you. Your support helps me run my small crafty business. Thank you so much!
- Sew Mighty Multifunction Portable Sewing Machine
- Dollar Tree Dish Drying Mats
- Zippers 12″ Assorted Bundle
- Rotary Cutter
- Self Healing Mat
- Multi-purpose Sewing Clips
- Pom Pom Maker
- Crafter’s Square White Yarn (available only in Dollar Tree stores)
- Mini Wire Brush (6-set)